Channel Configurations
Channel Configuration
You can see all the providers that DigiMe supports documented in the sidebar, under "Channel Configuration".
Please note that no providers are configured by default. You will need to configure them all in your .env file, or as environment variables. You will need to restart DigiMe whenever you change environment variables.
Step 1
Create a new app in Facebook developers(opens in a new tab), choose the business you want to connect it to.
Please be advised that for public applications you would need to verify you business.
Step 2
Select "Other" and click next
Step 3
Then select business
Add all your details and click Create App
Step 4
Set final details
Step 5
Set up login for business
Step 6
Set up a redirect URI back to the application
The default dev container redirect URI is http://localhost:4200/integrations/social/facebook
Step 7
Go to advanced permission and request access for the following scopes: pages_show_list business_management pages_manage_posts pages_manage_engagement pages_read_engagement read_insights
Step 8
Go to basic permissions copy your App ID and App Secret and paste them in your .env file
FACEBOOK_APP_ID="app id"
FACEBOOK_APP_SECRET="app secret"
Facebook should now be working!
Twitter(X)
X is a bit different.
They created an oAuth2 flow, but it works only with Twitter v2 API.
But in order to upload pictures to X, you need to use the old Twitter v1 API.
So we are going to use the normal oAuth1 flow for that (that supports Twitter v2 also 🤷🏻).
Head over the Twitter developers page(opens in a new tab) and create a new app.
Click to sign-up for a new free account

Click to edit the application settings

The click to set up an authentication flow

In the App Permission set it to Read and Write In the Type of App set it to Web App, Automated App or Bot In the App Info set the Callback URI / Redirect URL to http://localhost:4200/integrations/social/x Save it and go to "Keys and Tokens" tab
Click on "Regenerate" inside "Consumer Keys" and copy the API Key and API Key Secret. Open .env file and add the following:
X_API_KEY=""
X_API_SECRET=""Step 1
Create a new app in Instagram developers(opens in a new tab), choose the business you want to connect it to.
Please be advised that for public applications you would need to verify you business.
Step 2
Select "Other" and click next
Step 3
Then select business
Add all your details and click Create App
Step 4
Set final details
Step 5
Set up login for business
Step 6
Set up a redirect URI back to the application
The default dev container redirect URI is http://localhost:4200/integrations/social/instagram
Step 7
Go to advanced permission and request access for the following scopes: instagram_basic pages_show_list pages_read_engagement business_management instagram_content_publish instagram_manage_comments instagram_manage_insights
Step 8
Go to basic permissions copy your App ID and App Secret and paste them in your .env file
INSTAGRAM_APP_ID="app id"
INSTAGRAM_APP_SECRET="app secret"
Instagram should now be working!
Head over to Linkedin developers(opens in a new tab) and create a new app.

Fill in all the details, once created head over to Products and make sure you add all the required products.

It is important to request the Advertising API permissions and fill up the request form, or you will not have the ability to refresh your tokens.
Make sure your redirect URL is set to http://localhost:4200/integrations/social/linkedin for local development. Copy the created Client ID and Client Secret and add them to your .env file.
LINKEDIN_CLIENT_ID=""
LINKEDIN_CLIENT_SECRET=""Head over to Reddit developers(opens in a new tab) and create a new app. In the type of app, select web app and in the redirect uri, add http://localhost:4200/integrations/social/reddit.
Copy the Reddit client id and client secret and add them to your .env file.
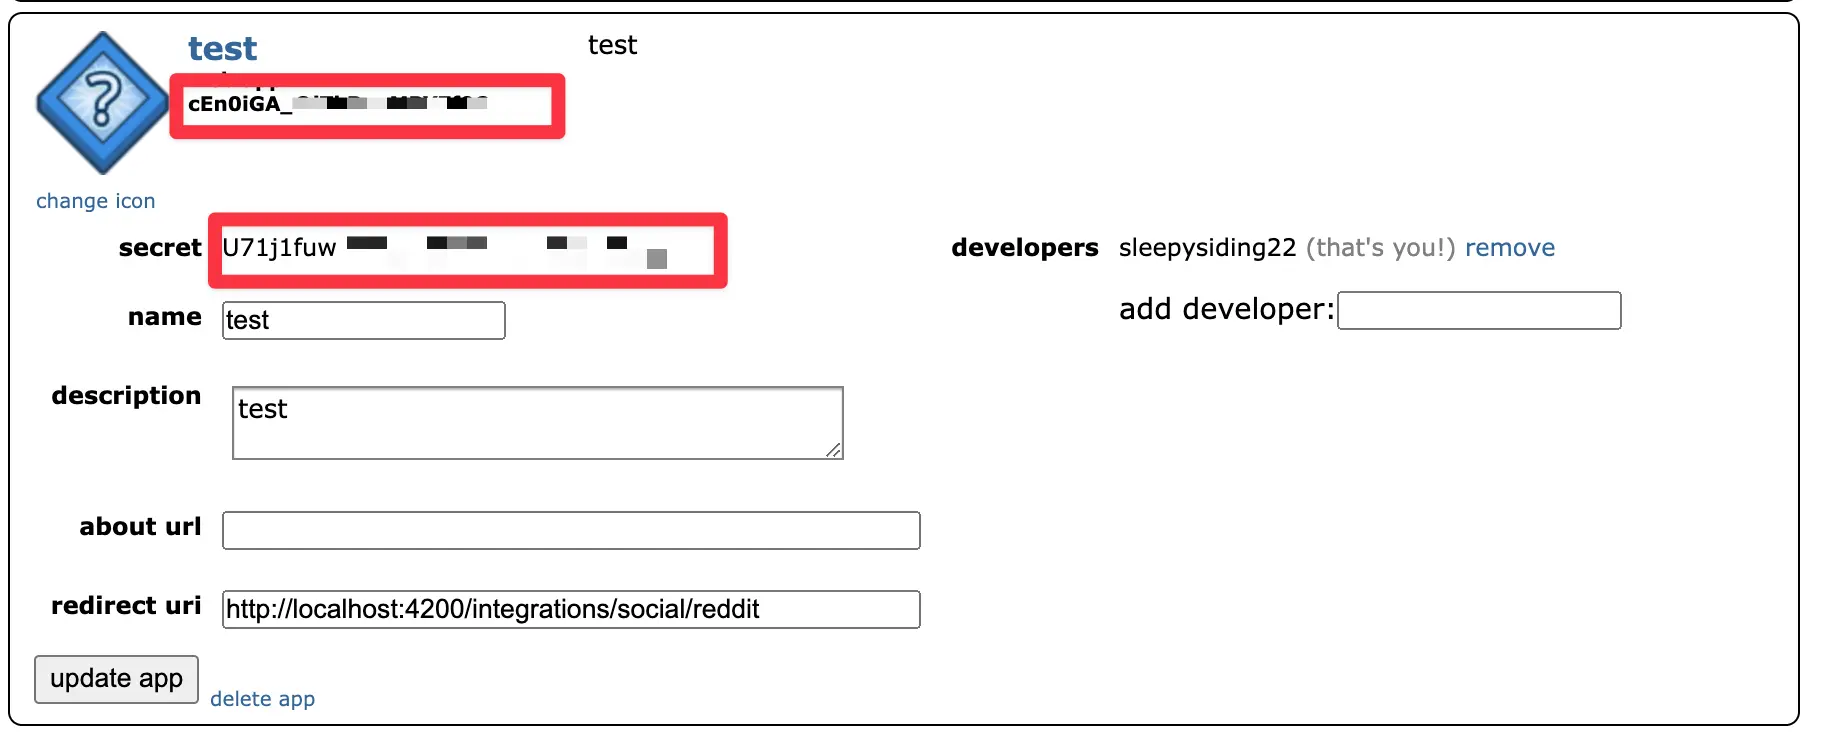
REDDIT_CLIENT_ID=""
REDDIT_CLIENT_SECRET=""
Mastodon
Mastodon client registration is not done via ther web interface, but by talking to the API directly. In the example below, we use curl to register a new client.
Optionally check that you have jq installed on your system. You can normally install this with brew, apt-get, yum or chocolatey. If you don't have jq installed, you can remove it from the command below.
Run the following curl command in a terminal to get the Mastodon client id and client secret.
curl -X POST -sS https://mastodon.social/api/v1/apps -F "client_name=YourAppName" -F "redirect_uris=http://localhost:4200/integrations/social/mastodon" -F "scopes=write:statuses write:media profile" | jqThis will give you output that looks something like this;
{ "id": "1234567890", "redirect_uris": [ "http://localhost:4200/integrations/social/mastodon" ], ... "client_id": "your_client_id", "client_secret": "your_client_secret"}Make a note of your client_id and client_secret and add them to your .env file.
MASTODON_CLIENT_ID="shown in the output from the above command"MASTODON_CLIENT_SECRET="shown in the output from the above command"Stop DigiMe if it is running, and then start it using the .env file with the Mastodon details. Click through the new channel setup and you should be asked to login on Mastodon.
YouTube
Step 1 Go to the Credentials Page
Make sure you are logged in to your Google account and visit the Credentials - APIs & Services(opens in a new tab) page. Make sure to read the terms and conditions and "Agree and Continue".
Step 2 Create Project
Create a new project by clicking on the "Create Project" button.
Step 3
Fill in the project name, and details and click "Create".
Step 4 Create OAuth Credentials
Create credentials by clicking on the "Create Credentials" button. Select the "OAuth client ID" option.
Step 5 Configure Consent Screen
Make sure that your consent screen has been configured. Add yourself as a test user of the application.
Step 6 Fill in OAuth Details
Create the OAuth client ID. Select "Web application" as the application type and fill in the details.
After following all of the steps above you should be met with a screen that shows your client ID and client secret. Add these to your providers configuration.
YOUTUBE_CLIENT_ID=""
YOUTUBE_CLIENT_SECRET=""
Discord
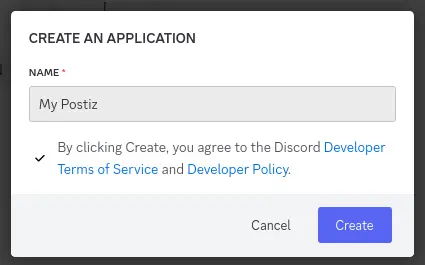
Create a Discord Application
Login to Discord on the web, and then go to the Discord Developer Portal(opens in a new tab) and click on "New Application".
Get and set your Client ID and Client Secret to a safe place.
You can find this in the OAuth2 section of the Discord Developer Portal.
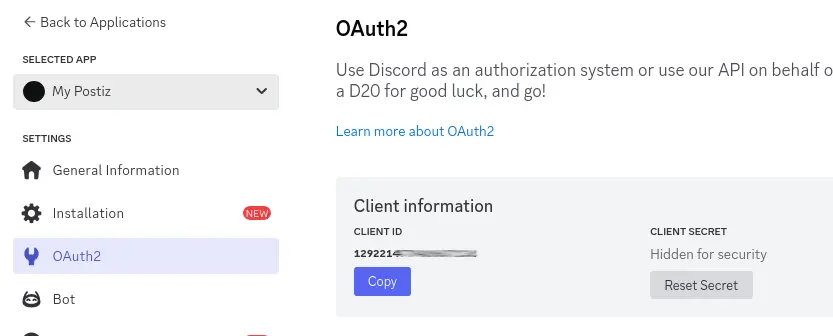
Set these in your .env file as follows;
DISCORD_CLIENT_ID="your_client_id"DISCORD_CLIENT_SECRET="your_client_secret"Create a Bot
With the token that is generated, set it in your .env file as follows;
DISCORD_BOT_TOKEN_ID="your_bot_token"If you do not set this, you will get 404 errors when trying to add the Discord channel in the Postiz web interface.
Stop Postiz if it is running, and then start it using the .env file with the Discord details.
Add a Redirect URI
The redirect URI is the URL that Discord will redirect to after you have logged in. Assuming you are runnning Postiz on postiz.example.com, this would be: https://postiz.example.com/integrations/social/discord. Alternatively if you are running on localhost:4200, this would be http://localhost:4200/integrations/social/discord.
Add a Discord channel in the Postiz web interface
Go to the Postiz web interface, and click on the "Add Channel" button, and then select "Discord". You should be redirected to Discord to login.
Dribble
Register your application
Register your application on Dribbble(opens in a new tab).
- Name:
MyPostizInstance - Description:
My Postiz Instance - Website:
https://example.com - Redirect URI:
http://localhost:4200/integrations/social/dribbble
Copy your client secret to environment variables
These can be found immediately after registering your application. These are both 64 characters long.
DRIBBLE_CLIENT_ID="1234..."DRIBBLE_CLIENT_SECRET="5678..."Restart Postiz with the updated environment variables
Add a Dribbble channel in the Postiz web interface
Go to the Postiz web interface, and click on the "Add Channel" button. Select "Dribbble" from the list of available channels. You should be redirected to Dribbble to authorize the application.
Tiktok
title: TikTok description: How to add TikTok to your system
This integration requires that you have a TikTok developer account. It also requires that you have a public website, with https, and can upload files to that site to verify ownership.
TikTok will also not allow http:// for your app redirect URI, so you will need to be accessing Postiz from HTTPS.
Create you app
Go here: https://developers.tiktok.com/apps(opens in a new tab)
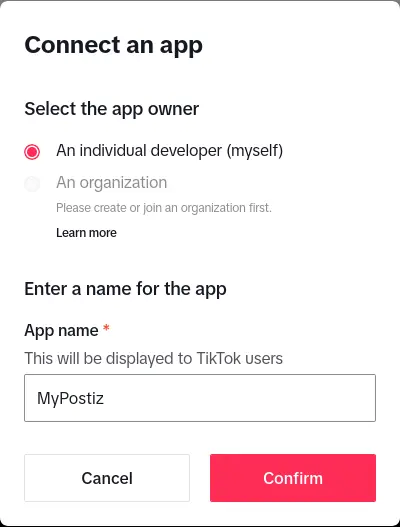
- App Name:
MyPostiz - Redirect URI:
http://localhost:4200/integrations/social/tiktok
Set a TOS and Privacy Policy
This needs to be on a public domain that you have access to, that is hosted on HTTPS.
Tick "Web" for your platforms.
Add apps
Add the "Login Kit" and "Content Posting API" to your app.
For "Login Kit", set the redirect URI to http://localhost:4200/integrations/social/tiktok(opens in a new tab)
For Content posting API, enable "Direct Post".
Add scopes
- user.info.basic
- video.create
- video.upload
Copy your client secret to environment variables
These can be found immediately after registering your application. The client ID is 16 characters long and the secret is 32 characters long.
TIKTOK_CLIENT_ID=1234567890123456TIKTOK_CLIENT_SECRET=12345678901234567890123456789012Restart Postiz with the updated environment variables
Add a TikTok channel in the Postiz web interface
Go to the Postiz web interface, and click on the "Add Channel" button. Select "TikTok" from the list of available channels. You should be redirected to TikTok to authorize the application.